
Golf Simulator Impact Screens: Pick Material, Size, and Gap
Choose a golf simulator impact screen after mapping the hitting position, projector image, and room clearance, not before. This guide explains how to coordinate material, dimensions, frame, rear gap, and launch monitor in a home simulator.
Key Takeaways
- Measure the room and plan the projector image before choosing a screen, so the viewable area fits both the available space and the projector’s shape.
- Allow separate space for frame attachment and for the screen to flex behind its face. One supports mounting and tension; the other helps absorb ball impacts.
- Compare screen construction for projected detail, ball impact noise, rebound, and expected shot volume. A smoother weave and a softer knitted surface have different trade-offs.
- Protect the sides and ceiling as well as the screen, since missed shots can reach walls, windows, lights, people, or equipment.
Free Printable Worksheet (PDF)
Print or save the one-page companion to this guide: Golf Simulator Impact Screen Sizing and Setup Checklist. It collects the key tables and the checklist from this article.
Related guides
Compare Screen Materials, Weaves, and Finishes
An impact screen catches golf balls while providing a surface for the projected course. Its material and construction affect image definition, impact noise, ball rebound, and how the screen behaves under repeated use.
Multi-layer polyester uses more than one fabric layer to absorb impact. Compared with a hard, tightly tensioned surface, it can soften noise and rebound, while adding thickness and weight.
BenQ describes the following categories as common among impact screens on the market:
| Reported construction | What that means for a builder |
|---|---|
| Most impact screens on the market fall into two categories: 2.5 mm thick single-layer noise-cancelling screens or 5.0 mm thick dual-layer noise-cancelling screens. The dual layers are two identical pieces of noise-cancelling fabric joined with Velcro. | Compare the actual layer construction alongside the screen’s image surface, impact feel, and intended use. |
A tightly woven, smooth face can make projected text and course detail look more defined. That construction can also pass more impact sound or rebound than a softer, more open surface.
Knitted fabric forms loops that give under impact, which can reduce sharp rebound and noise. Its texture may make projected detail less crisp than on a smooth woven face, especially when the projector image has fine lines or text.
For frequent practice, give durability and manageable maintenance more weight. Occasional use can put more emphasis on image quality or budget, as long as the screen is designed for golf ball impacts.
Raw screen material gives a builder flexibility to cut and fit the fabric, but it needs a secure edge attachment that spreads the pull. A finished screen with borders and grommets can simplify mounting and adjustment. Brands such as Carl’s Place, Rain or Shine Golf, SIGPRO, and Spornia offer different screen and enclosure formats, so compare construction rather than relying on a name alone.
- Budget tier: Prioritize an impact-rated face, a practical way to mount it, and enough protection around the hitting area.
- Mid-range tier: Consider a finished screen with a construction that balances image detail, sound, and rebound.
- Premium tier: Look for a purpose-built screen with multiple layers and a finish suited to regular practice and the projected image you want.
Match Screen Size to Room and Projector Shape
Measure room width and height at the screen plane, then account for frame clearance, attachment, and tension before deciding how much area can show the image. The usable projection area is not always the same as the full piece of fabric.
For the example room below, AmateurGolf.com gives this maximum viewable width calculation:
| Room width | Calculation | Maximum viewable width |
|---|---|---|
| 200” W | 200” room width less 20” equals 180” | 180” |
Use that calculation as a model, not a standard fit for every room. Measure your own finished width from wall to wall and subtract the space your frame and attachment method need.
Match the screen aspect ratio to the projector image. A 16:9 screen is a common widescreen shape, while 4:3 is taller in proportion to its width; a mismatch can leave unused borders or crop part of the image.
| Screen aspect ratio | Shape at the same width | Planning point |
|---|---|---|
| 4:3 | Taller relative to its width | Choose it when the projector image and available height suit the squarer format. |
| 16:9 | Wider relative to its height | Choose it when the projector is set to a widescreen image and the room can fit that shape. |
Check the projector’s native image shape and placement before ordering. Our projector planning guide also explains how screen area and room lighting affect the projected result.
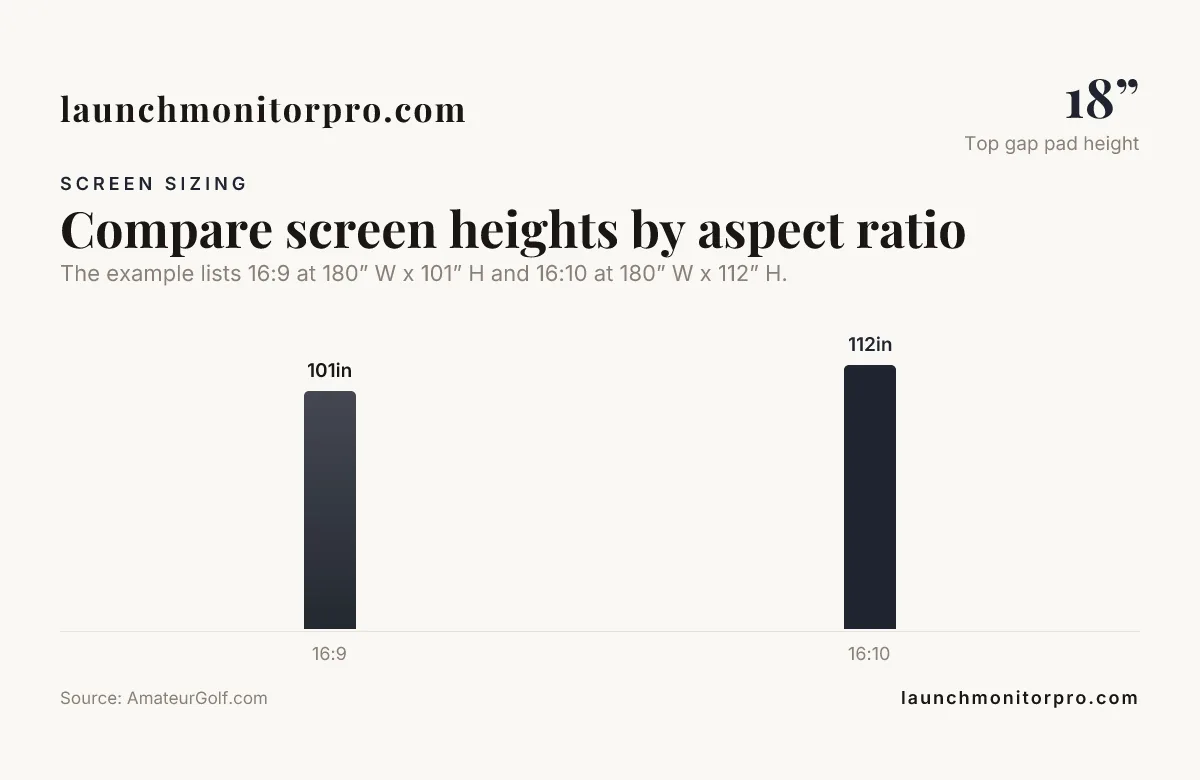
Check the full fabric dimensions separately from the viewable area. Finished borders, hems, grommets, and attachment points can extend beyond the part used for projection.
Set screen height only after accounting for floor covering, a raised mat, ceiling lights, beams, the projector beam, and a full swing with the longest club. Our home golf simulator setup guide walks through the full layout in order.
Choose the Frame and Mounting Method
An enclosure combines a screen with a frame and side protection, helping contain shots that miss to the side. It uses more room than a screen alone, so fit the finished screen and enclosure to the measured space.
A freestanding frame can suit a simpler layout, but it does not remove the need for side or ceiling protection. Add barriers wherever a missed shot could reach a person, window, wall, light, or piece of equipment.
Size the frame around the finished screen rather than ordering both to identical dimensions. Leave room at the perimeter for attachment and moderate, even tension.
Attach the screen evenly around its edges. Too much tension can stress the fabric or its finish, while excessive slack can create waves that disturb the projected image.
For a DIY enclosure or EMT frame, distribute the pull along the screen edge with a suitable attachment method. Pulling hard at only a few points concentrates stress and can lead to uneven tension or edge wear.
Keep attachment points evenly spaced. Start at the center of each edge, make small pulls, then alternate between opposite edges and work toward the corners so one side does not take the full load first. Once the corners are secured, check for diagonal creases and confirm the face can still flex. If one area is tight while another sags, redistribute the pull rather than tightening the whole edge.
Set the Rear Gap, Hitting Distance, and Ball Protection
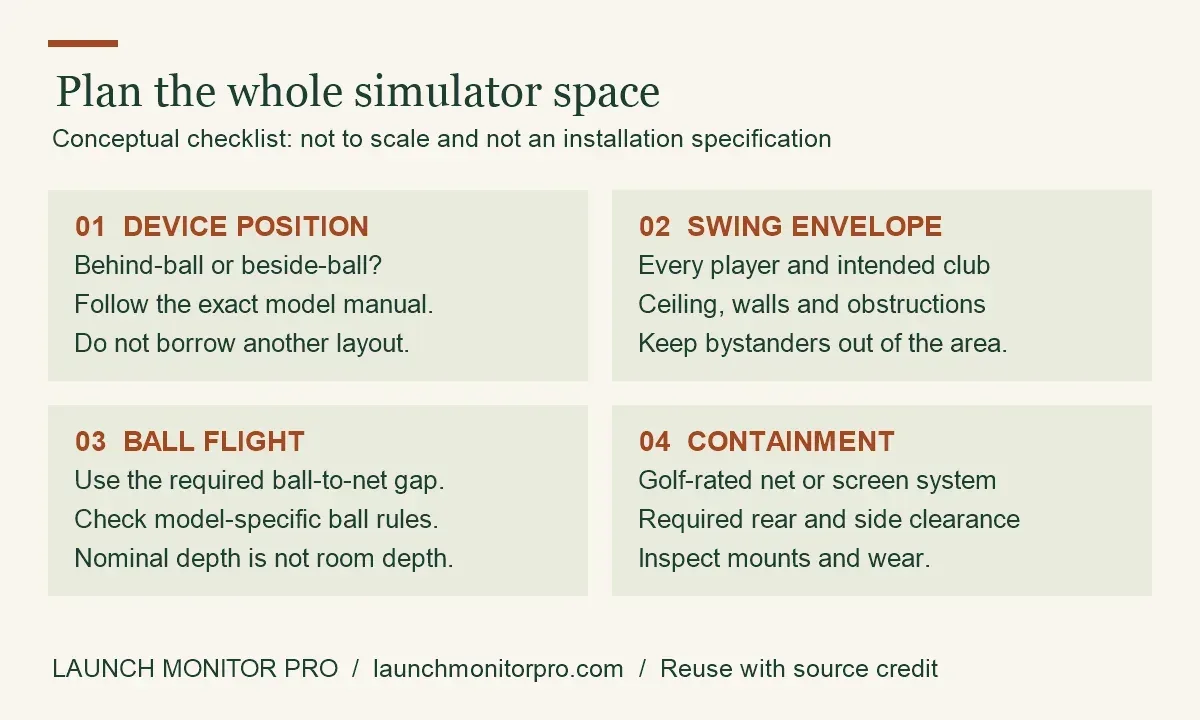
Leave open space between the screen and the wall or net behind it so the fabric can flex when struck. Frame clearance around the perimeter is separate from this rear clearance, and neither measurement replaces the other.
Allow around 1.5 ft between the screen and the wall behind it, and around 10 to 12 ft from tee to impact screen as starting points, not fixed requirements. Check the screen and monitor makers’ setup guidance, then use the room dimensions guide to map the full setup and confirm the mounted screen can flex without contacting anything.
Keep enough distance from the hitting position for an unobstructed swing with the longest club. The screen must also be able to move under impact without touching a hard wall, frame part, or equipment behind it, which can increase rebound or cause damage.
Use side netting where wide misses could reach exposed areas, and add ceiling protection above the hitting or screen zone when overhead misses are possible. A full enclosure can combine the screen and side protection, while a freestanding screen needs separate barriers where the room requires them.
Before installation, mark the intended hitting position and test a full swing. Check that the screen, frame, ceiling, and side barriers stay clear of the swing path.
Place the Screen for Your Launch Monitor
Radar units need room around the ball and monitor, plus enough ball flight for the system’s intended setup. A screen moved toward the hitter shortens the available flight area, so plan the screen plane together with the unit position.
For the Garmin Approach R10, place the unit 6 to 8 ft behind the ball and allow at least 8 ft from ball to net. See our radar launch monitor spacing guide, and keep the unit-to-ball distance, ball-to-screen distance, and rear flex gap as separate measurements.
The FlightScope Mevo+ also uses radar, so map its intended ball and unit positions before fixing the screen. The Rapsodo MLM2PRO combines radar with optical cameras, which means its layout needs both room for radar tracking and a clear camera view of the hitting area.
Bushnell Launch Pro, SkyTrak+, and Uneekor EYE MINI use cameras and need a clear view of the hitting zone. Position the screen and enclosure so they do not block that view or interfere with the monitor’s intended alignment.
Mock up the monitor, hitting position, screen plane, and projector image together before fastening the frame. Consider how each unit’s room layout works with your screen plan.
Installation Checklist
- Measure room width and height at the screen plane, including floor changes, ceiling obstructions, and frame attachment space.
- Set the hitting position and monitor first, then check available ball flight and camera sightlines before fixing the screen location.
- Match the projector image shape to the viewable screen area, and distinguish that area from the full fabric and finished borders.
- Plan frame clearance, screen tension, and the rear flex gap as three separate decisions.
- Plan side and ceiling protection, then test the full swing and screen movement with missed shots safely contained.
Summary
Plan the golf simulator impact screen around the projector image, room, frame, hitting position, and launch monitor. Choose material for the balance of image detail, noise, rebound, and use, then leave separate space for attachment and impact flex.
Frequently Asked Questions
Can a regular projector screen be used for golf ball impacts?
No. Ordinary projection fabric is not designed to take repeated golf ball impacts, and it can tear or behave unpredictably when struck. Use a screen made for golf simulator impacts.
What is the difference between raw impact screen fabric and a finished screen with grommets?
Raw fabric can be cut to a custom outline, but its edge needs a secure finish before it can be mounted reliably. A finished screen has prepared edges and grommets that provide ready attachment points.
How can I reduce wrinkles or waves in a golf simulator impact screen?
Store the fabric rolled rather than folded to avoid sharp creases. If waves appear after installation, adjust tension evenly around the perimeter instead of pulling only at the most visible crease.
How often should an impact screen be cleaned or inspected?
Inspect the screen before each practice session for loose attachments, new marks, or changes in its surface. Remove dust with a clean, soft cloth and use a lightly damp cloth for small marks, then let the fabric dry fully.
What usually causes an impact screen to wear out sooner?
Repeated strikes in one concentrated area, abrasive dirt on balls, and contact with rough frame edges can speed wear. Direct sunlight and heat can also age fabric, so keep the screen protected when the simulator is not in use.
Download the Companion Printable Sheet (PDF)
Print or save the one-page companion to this guide: Golf Simulator Impact Screen Sizing and Setup Checklist. It collects the key tables and the checklist from this article.
Published by Launch Monitor Pro, a publication of Viking Trading Group LLC.